Elementor integration
Install Seatext on your website by following the instructions below. The installation process is secure, and the AI remains inert until activated, ensuring the integrity of your website's content. Before you can install the script, you need a SEATEXT AI account. If you don't have an account yet, you can create one HERE
Elementor Integration
Important If you are using wpengine.com follow the instruction here
Step by step integration
Copy the Javascript code from SEATEXT AI which appear in this section below.
SEATEXTCODEINTEGRATION
1 . Installing SEATEXT with a WordPress Plugin
The recommended way to install SEATEXT AI on your website is by using the Headers and Footers by WPBeginner plugin. This will allow you to easily add code snippets to your WordPress site.
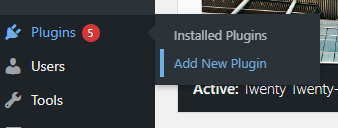
Go to your WordPress website admin dashboard and click “Plugins,” then “Add new”.
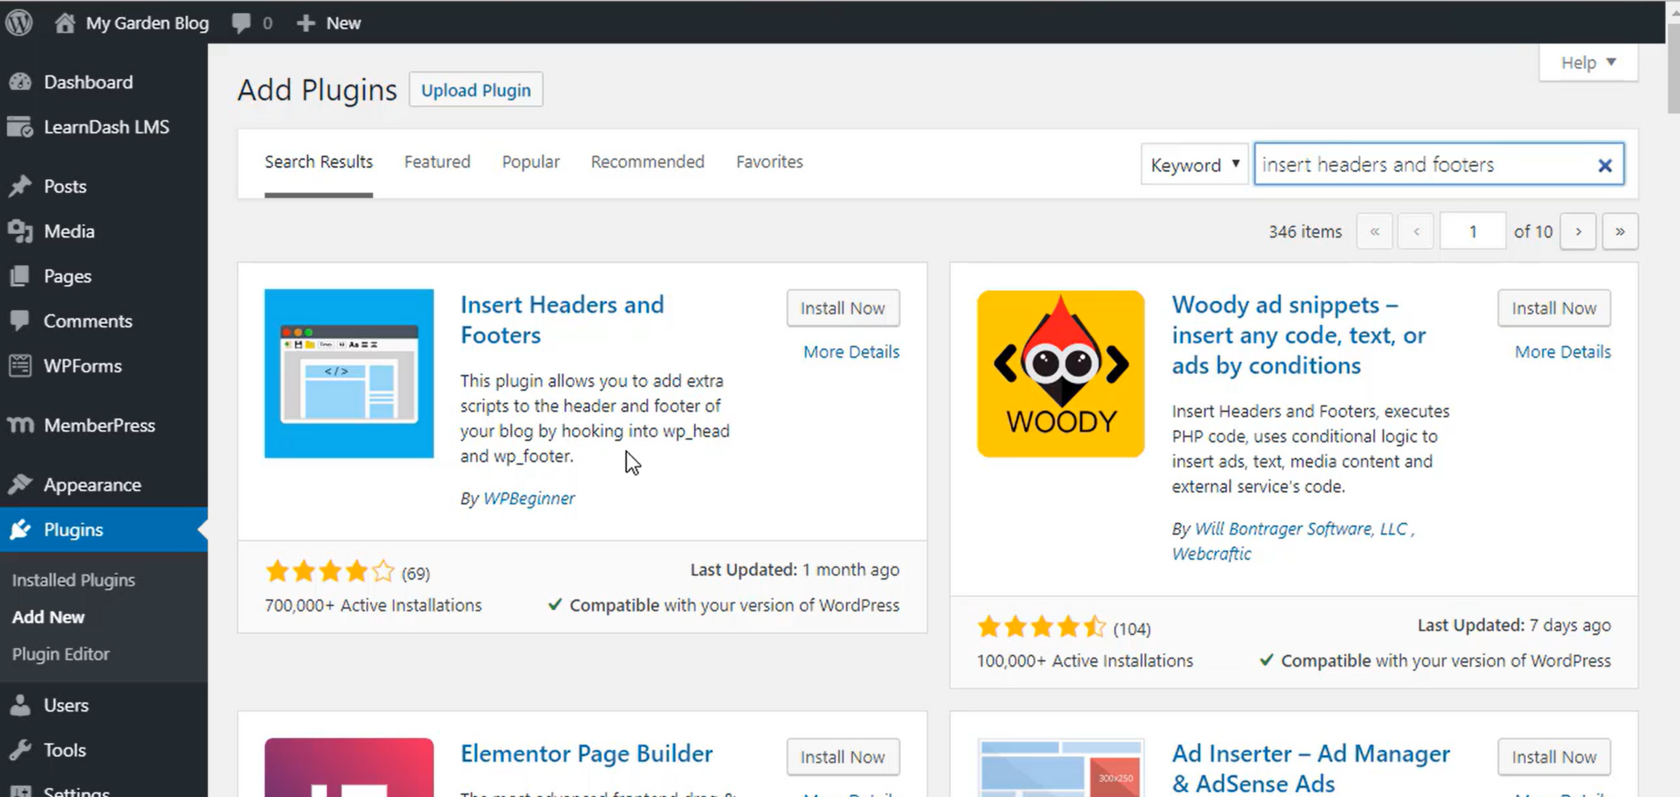
2 . Search for ''Insert Headers and Footers'' and install the plugin.
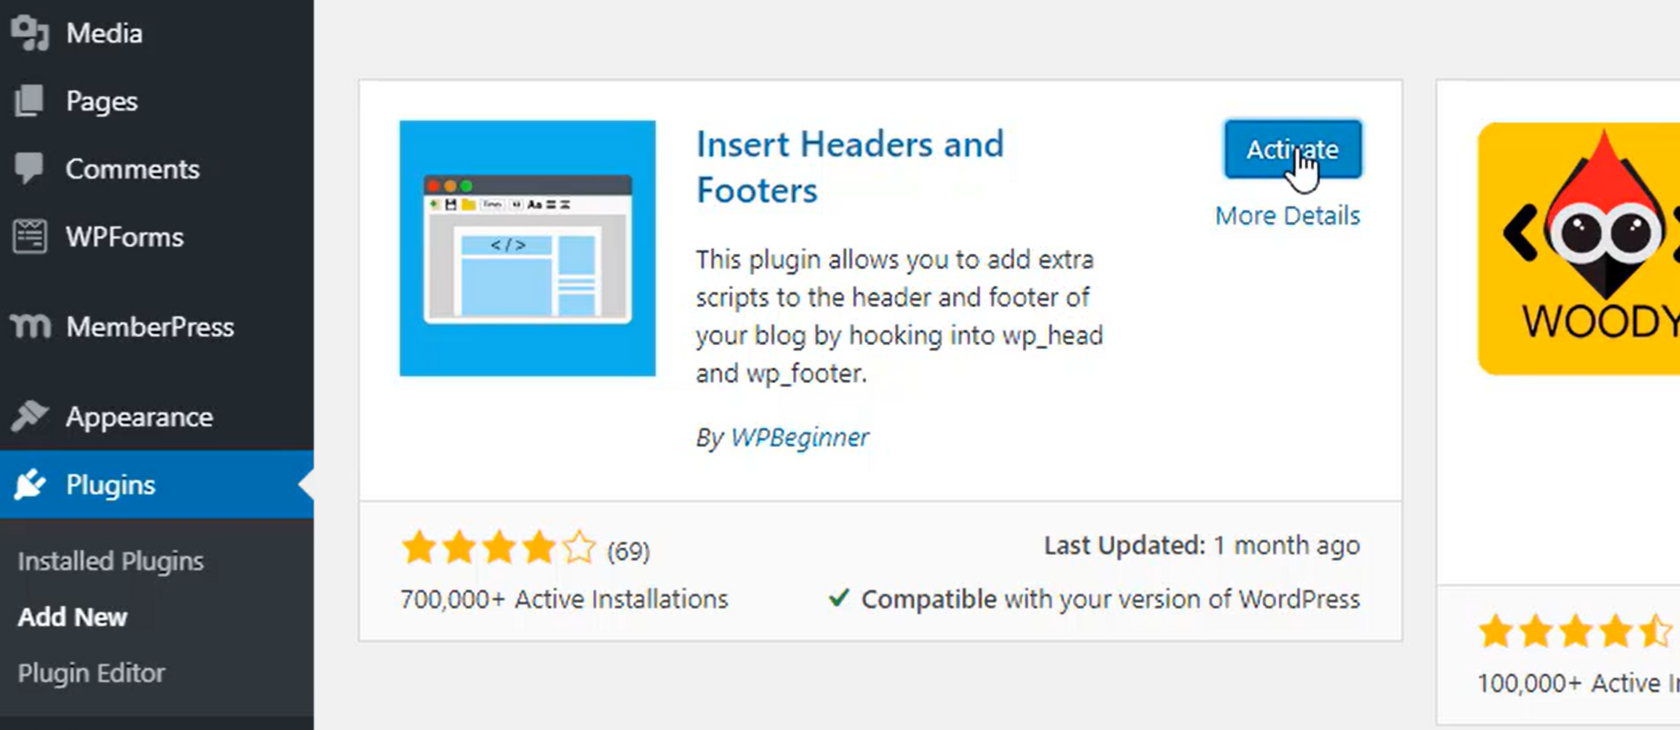
3 . Once installed, activate the plugin.
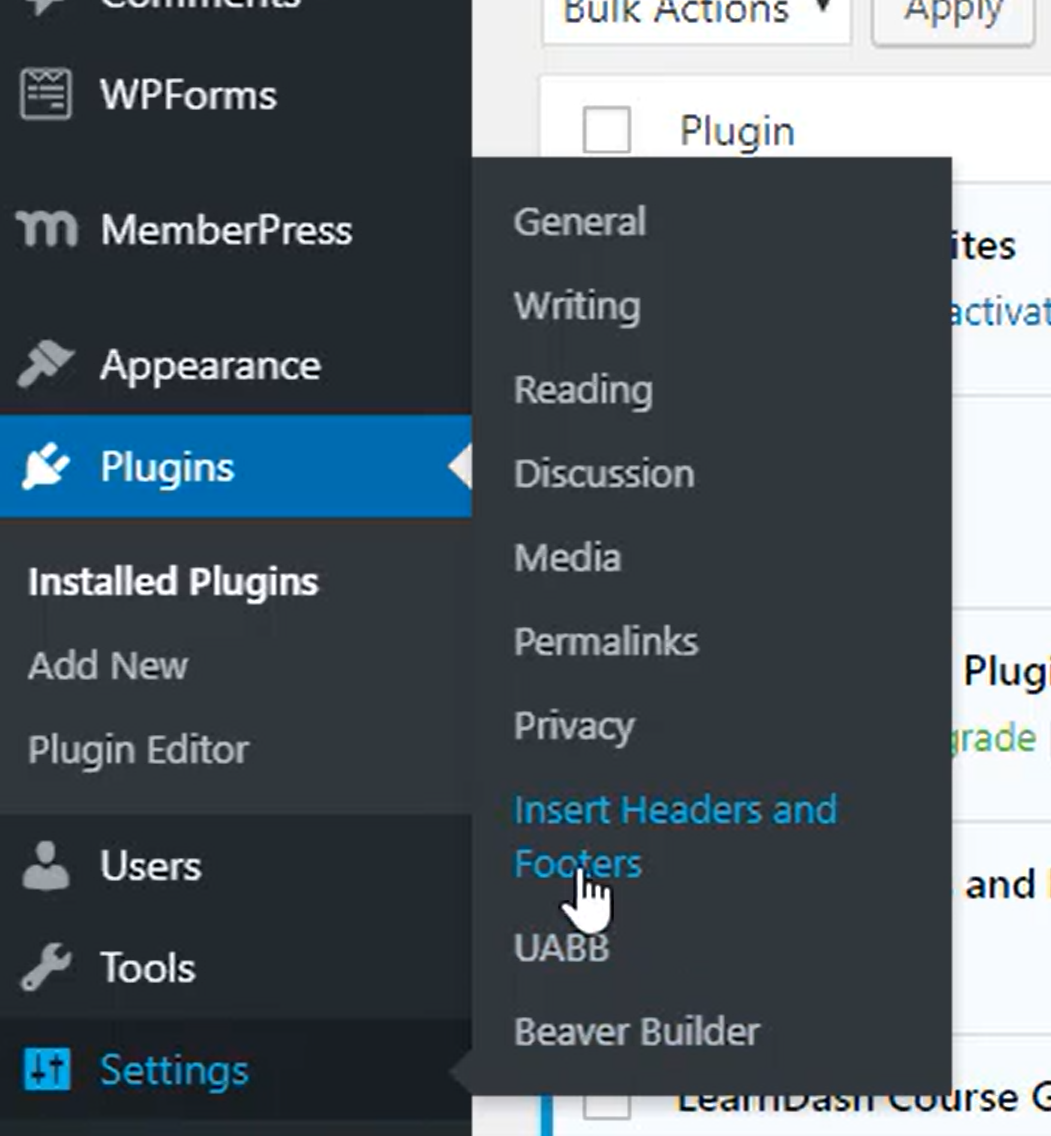
4 . In the Settings section select Insert Headers and Footers.
5 . Paste the code provided by SEATEXT AI into the "Scripts In Header" section. Then Click "Save''.
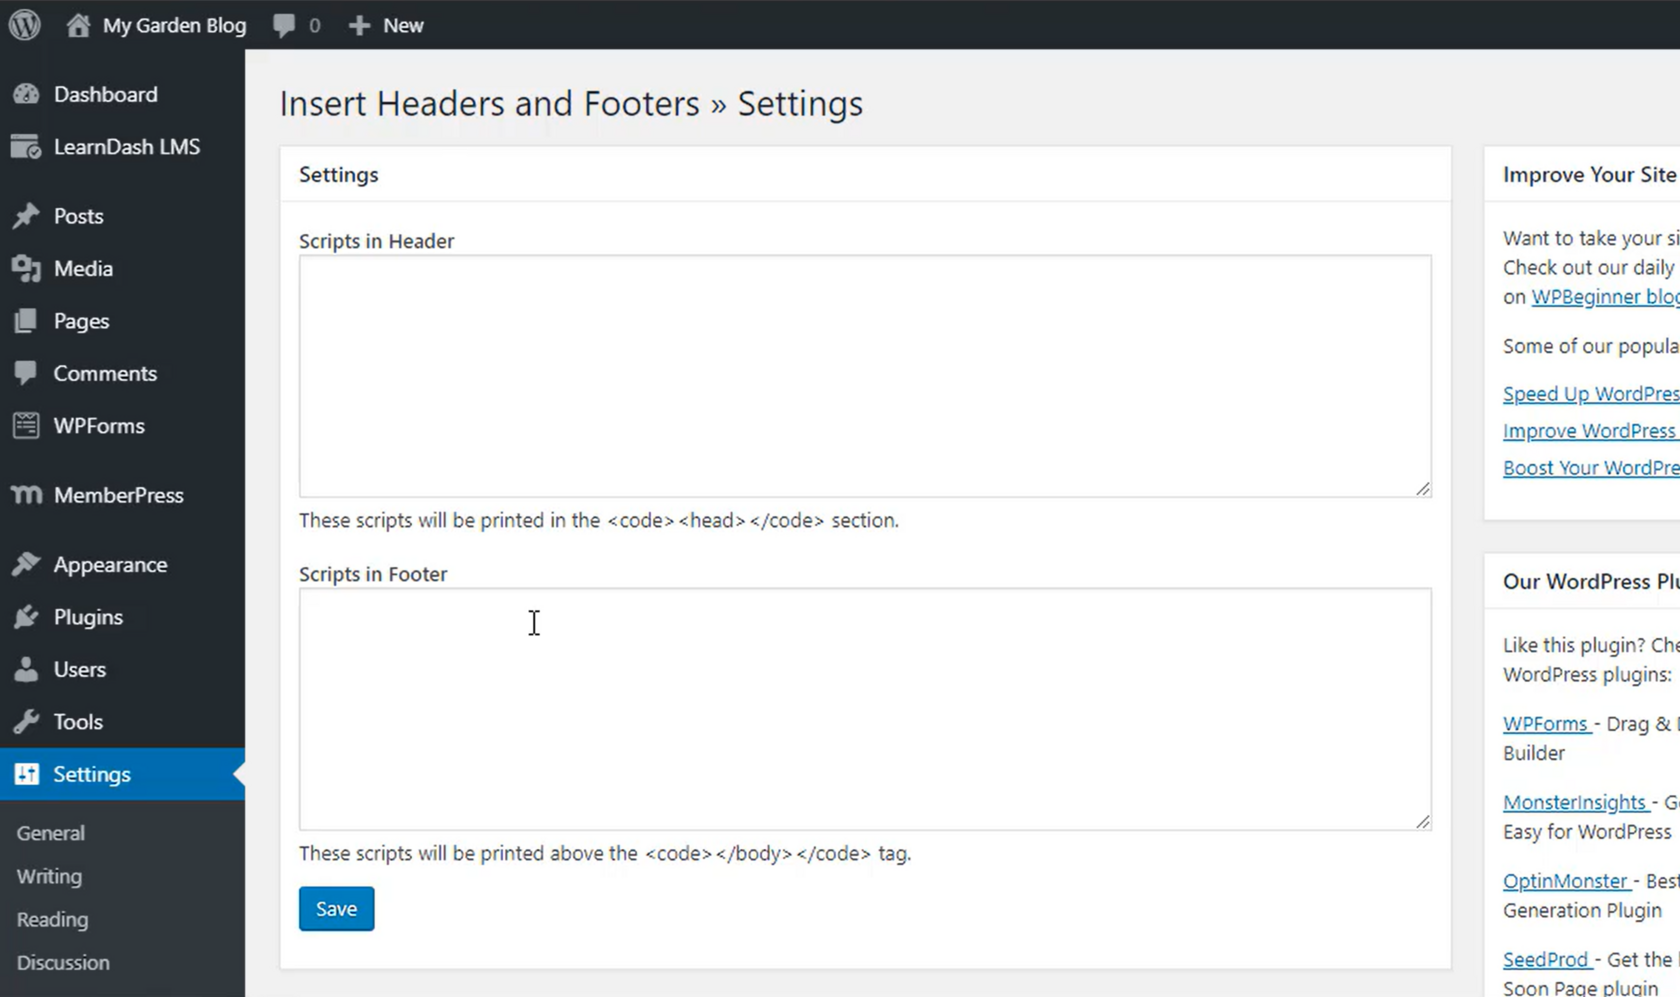
Important: Visit or refresh your website several times and stay on your page for at least 40 seconds—this will activate the AI and link it to your account.
6 . Once SEATEXT AI is installed on your website, the name of your website will appear in the top left of your SEATEXT account after a few minutes. If this does not happen, please feel free to contact us, and we will get in touch as soon as possible.
Multiple Domains If you need to use SEATEXT AI on multiple domains (e.g., a development domain and a production domain), you must create separate accounts for each domain. Each SEATEXT AI account is linked to a single primary URL. Restrictions and Security Development URLs, such as localhost, are restricted for security reasons. Ensure you use a valid, real domain for these cases. Dynamic development domains may not function properly, as SEATEXT AI might be unable to reliably associate traffic with your account. Using SEATEXT AI on Multiple Websites To use SEATEXT AI on several websites, create one account for each website.
Important: Visit or refresh your website several times and stay on your page for at least 40 seconds—this will activate the AI and link it to your account.
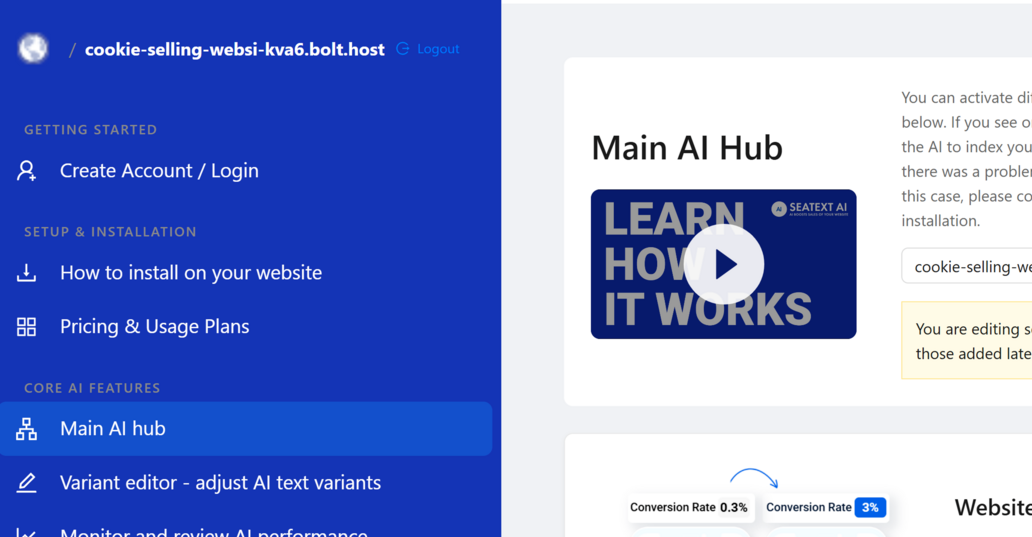
Important: Wait at least five minutes until you see your website name displayed next to the SEATEXT logo at the top of this page. This indicates that your website is connected and ready to proceed to the next step. If you do not see it at the top of the page after 10 minutes, please contact our support team immediately. This could indicate an issue during the installation on your platform, and you may need our assistance.