Install Seatext on your website by following the instructions below. The installation process is secure, and the AI remains inert until activated, ensuring the integrity of your website's content.
Wordpress Integration
Copy the Javascript code from SEATEXT AI which appear in this section below.
Step by step integration
SEATEXTCODEINTEGRATION
Access your WordPress account and navigate to the WordPress admin panel. Within the admin panel, locate and select “Appearance” from the menu options. From the dropdown menu, choose “Theme File Editor”.
You have now successfully installed SEATEXT AI on your website using JavaScript. Allow one hour for SEATEXT AI to scan your website and translate and create all content variants.
Activating AI: Proceed to the Main AI Hub to activate the necessary AI on your preferred pages. Click on "Configuration" to adjust the AI parameters.
Optional Editing: SEATEXT AI provides your initial round of automatic translations and variants for testing. Log in to your SEATEXT AI account, navigate to "Variants Edit" in the left panel, and select the URL and language you wish to edit. Here, you can review, create, or manually edit translations for your variants.


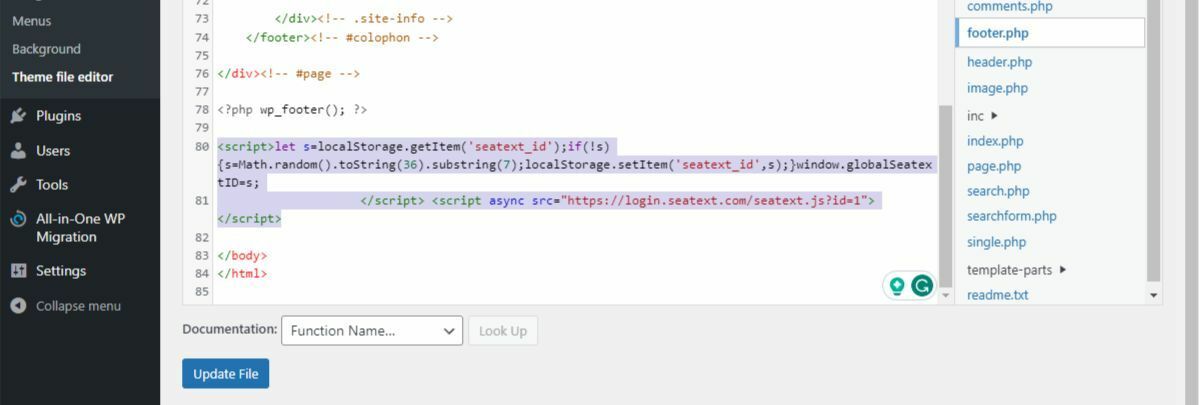

Within the Edit Themes, you will be presented with a list of theme files on the right-hand side of the screen. Locate and click on “footer.php” from the list of Theme Files.
Once the code snippet has been successfully pasted, click on the “Update File” button to save your changes.
Within the footer.php file, scroll down to the bottom of the code. Here, you will find the closing </body> tag.
Paste the JavaScript code snippet provided by SEATEXT AI directly above the closing </body> tag.