Zendesk integration
Zendesk Integration
Step 1: copy the JavaScript code provided by SEATEXT AI, which can be found in the section below.
Step by step integration
1
Zendesk Integration
Step 1: copy the JavaScript code provided by SEATEXT AI, which can be found in the section below.
Step by step integration
1
SEATEXTCODEINTEGRATION
Step 2: Paste the Javascript code from Seatext on your website
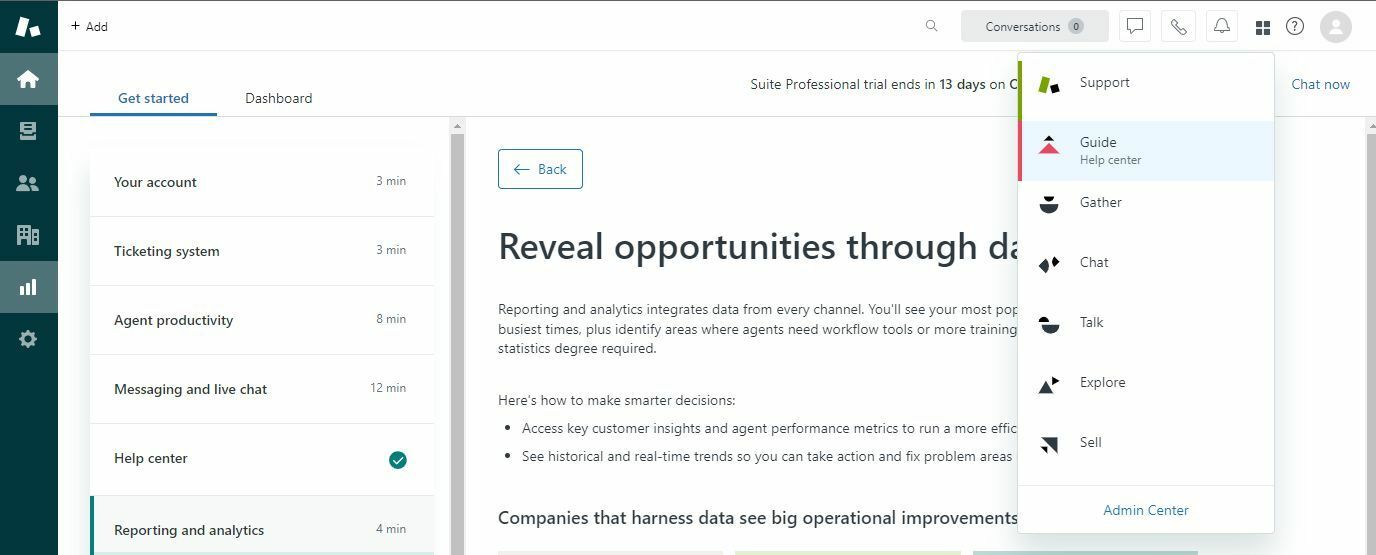
Access the "Guide" section of your Zendesk dashboard. In your Zendesk dashboard, locate and click on the four small square icon, then select "Guide" from the options provided.
You have now successfully installed SEATEXT AI on your website using JavaScript.
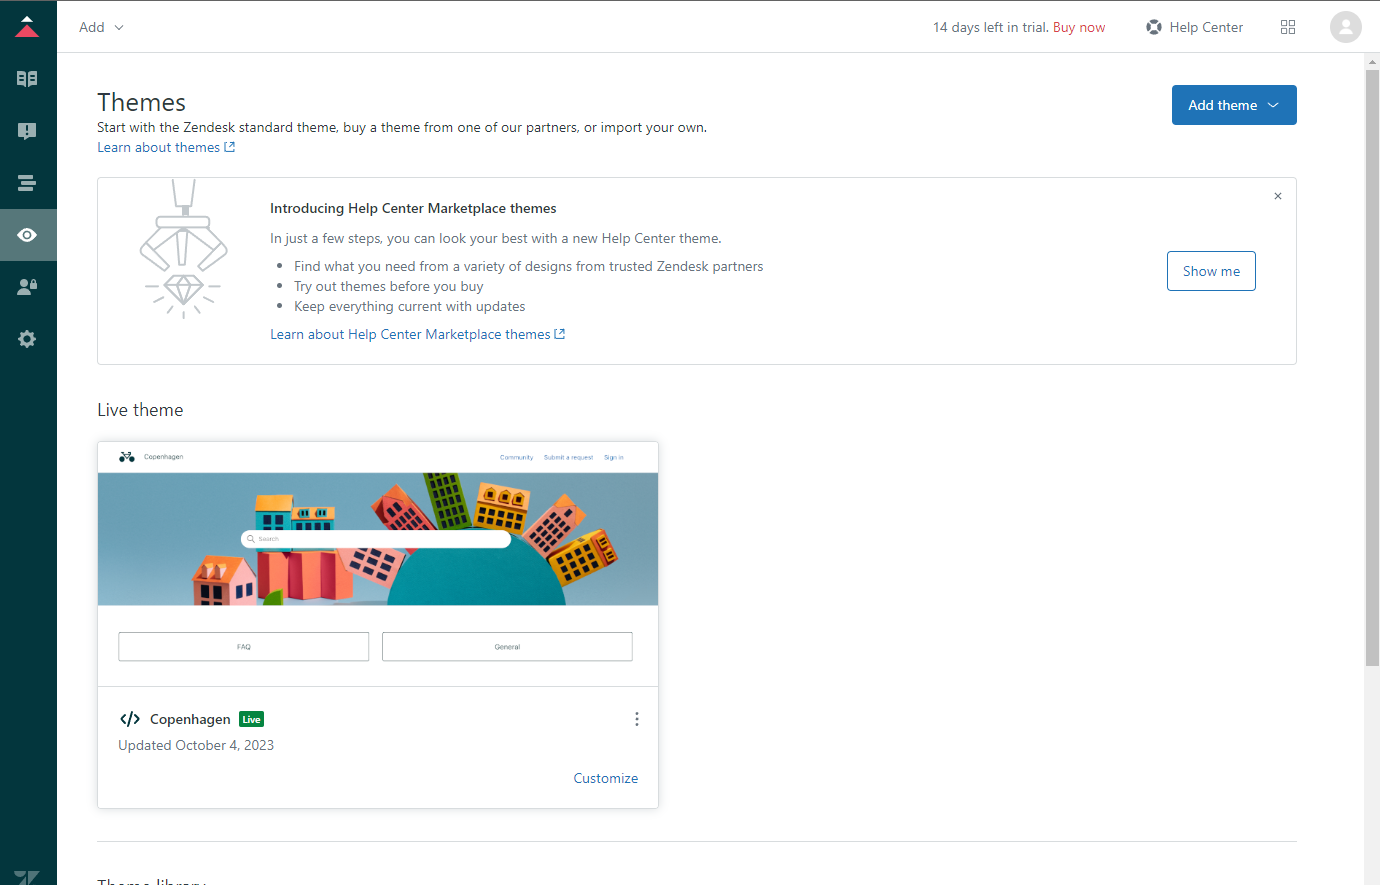
Navigate to the "Custom Design" tab. Click on the "Custom Design" button found in the sidebar, then select "Customize" to access the customization settings.
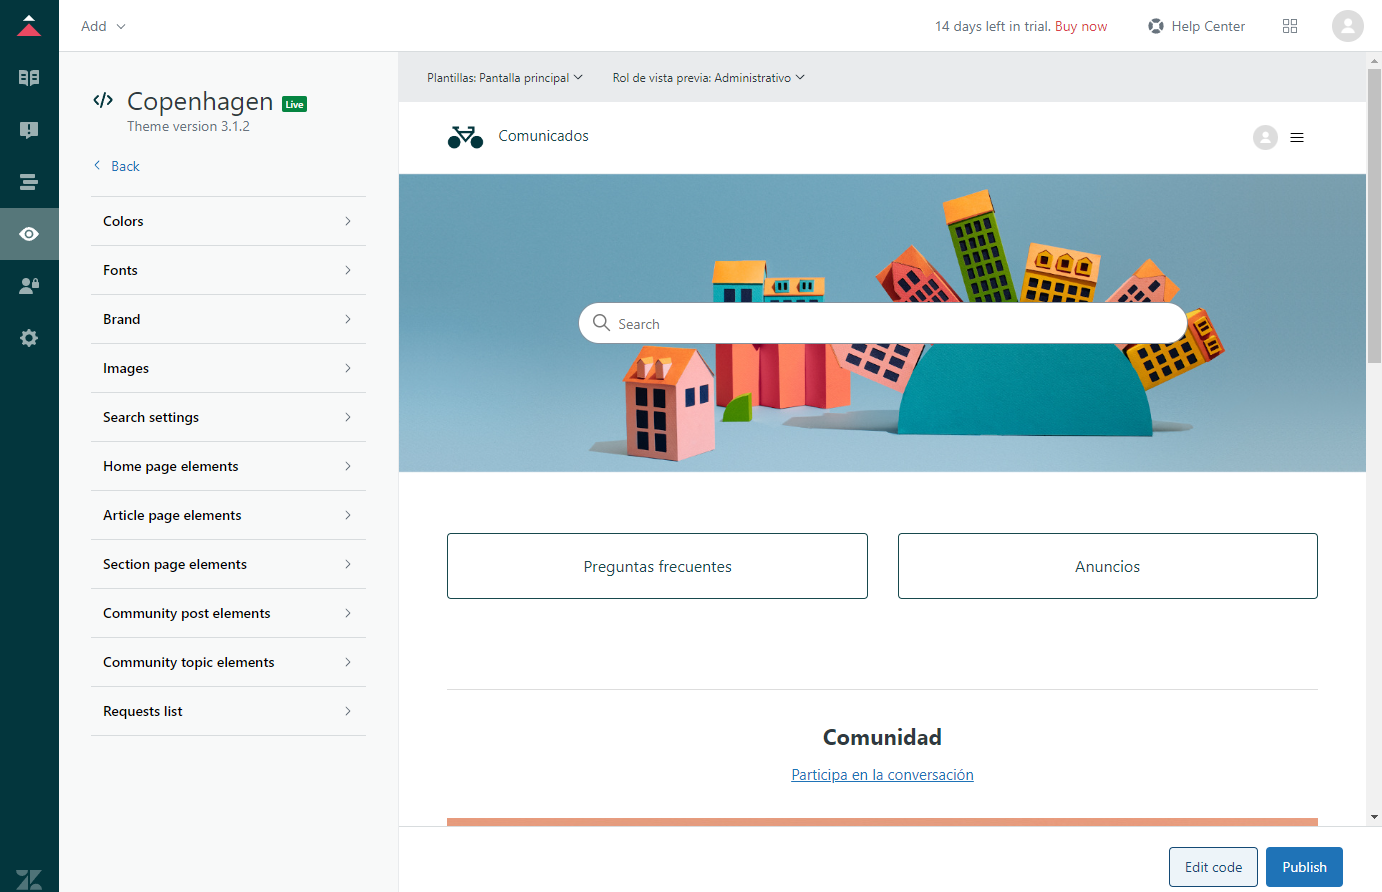
Select "Edit code" from the customization options.
In the left panel, navigate to the Files section and select the "document_head.hbs" file. Paste the code snippet provided by SEATEXT AI into the designated field within the "document_head.hbs" file. Finally, click on "Publish" to apply the changes and integrate SEATEXT AI into your Zendesk platform.
Step 2: Paste the Javascript code from Seatext on your website
Access the "Guide" section of your Zendesk dashboard. In your Zendesk dashboard, locate and click on the four small square icon, then select "Guide" from the options provided.
You have now successfully installed SEATEXT AI on your website using JavaScript.
Navigate to the "Custom Design" tab. Click on the "Custom Design" button found in the sidebar, then select "Customize" to access the customization settings.
Select "Edit code" from the customization options.
In the left panel, navigate to the Files section and select the "document_head.hbs" file. Paste the code snippet provided by SEATEXT AI into the designated field within the "document_head.hbs" file. Finally, click on "Publish" to apply the changes and integrate SEATEXT AI into your Zendesk platform.

Linking SEATEXT AI to your website
2
Linking SEATEXT AI to your website
2
a. Use the form below to add your website address in the format (www.example.com). SEATEXTURLPUSH
c. Wait at least five minutes until you see your website name displayed next to the SEATEXT logo at the top of this page. This indicates that your website is connected and ready to proceed to the next step. If you do not see it at the top of the page after 10 minutes, please contact our support team immediately. This could indicate an issue during the installation on your platform, and you may need our assistance.
IMPORTANT b. Visit your website once and stay on your page for at least 40 seconds—this will activate the AI and link it to your account.
a. Use the form below to add your website address in the format (www.example.com). SEATEXTURLPUSH
IMPORTANT b. Visit your website once and stay on your page for at least 40 seconds—this will activate the AI and link it to your account.
c. Wait at least five minutes until you see your website name displayed next to the SEATEXT logo at the top of this page. This indicates that your website is connected and ready to proceed to the next step. If you do not see it at the top of the page after 10 minutes, please contact our support team immediately. This could indicate an issue during the installation on your platform, and you may need our assistance.
Activating AI
3
Activating AI
3
Proceed to the Main AI Hub to activate the necessary AI on your preferred pages. Click on "Configuration" to adjust the AI parameters. Optional Editing: SEATEXT AI provides your initial round of automatic translations and variants for testing. Log in to your SEATEXT AI account, navigate to "Variants Edit" in the left panel, and select the URL and language you wish to edit. Here, you can review, create, or manually edit translations for your variants.
Proceed to the Main AI Hub to activate the necessary AI on your preferred pages. Click on "Configuration" to adjust the AI parameters. Optional Editing: SEATEXT AI provides your initial round of automatic translations and variants for testing. Log in to your SEATEXT AI account, navigate to "Variants Edit" in the left panel, and select the URL and language you wish to edit. Here, you can review, create, or manually edit translations for your variants.